

Install the widget on PrestaShop
This guide covers PrestaShop 1.7 and uses the JustReview Testimonials widget as the example. Every other widget works the same way.
-
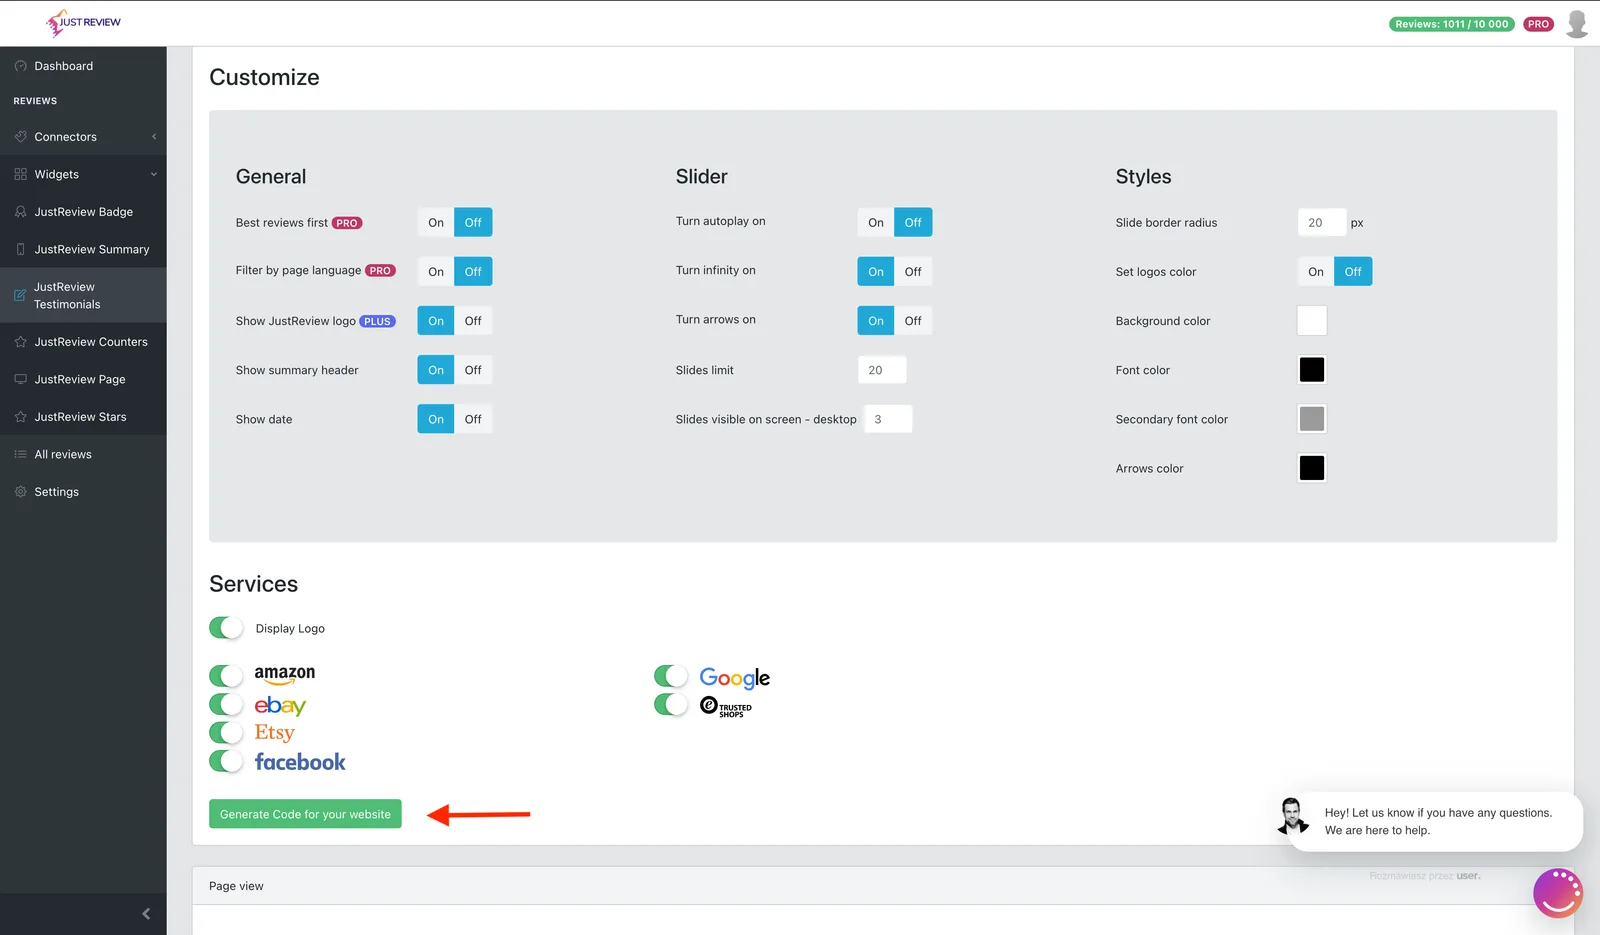
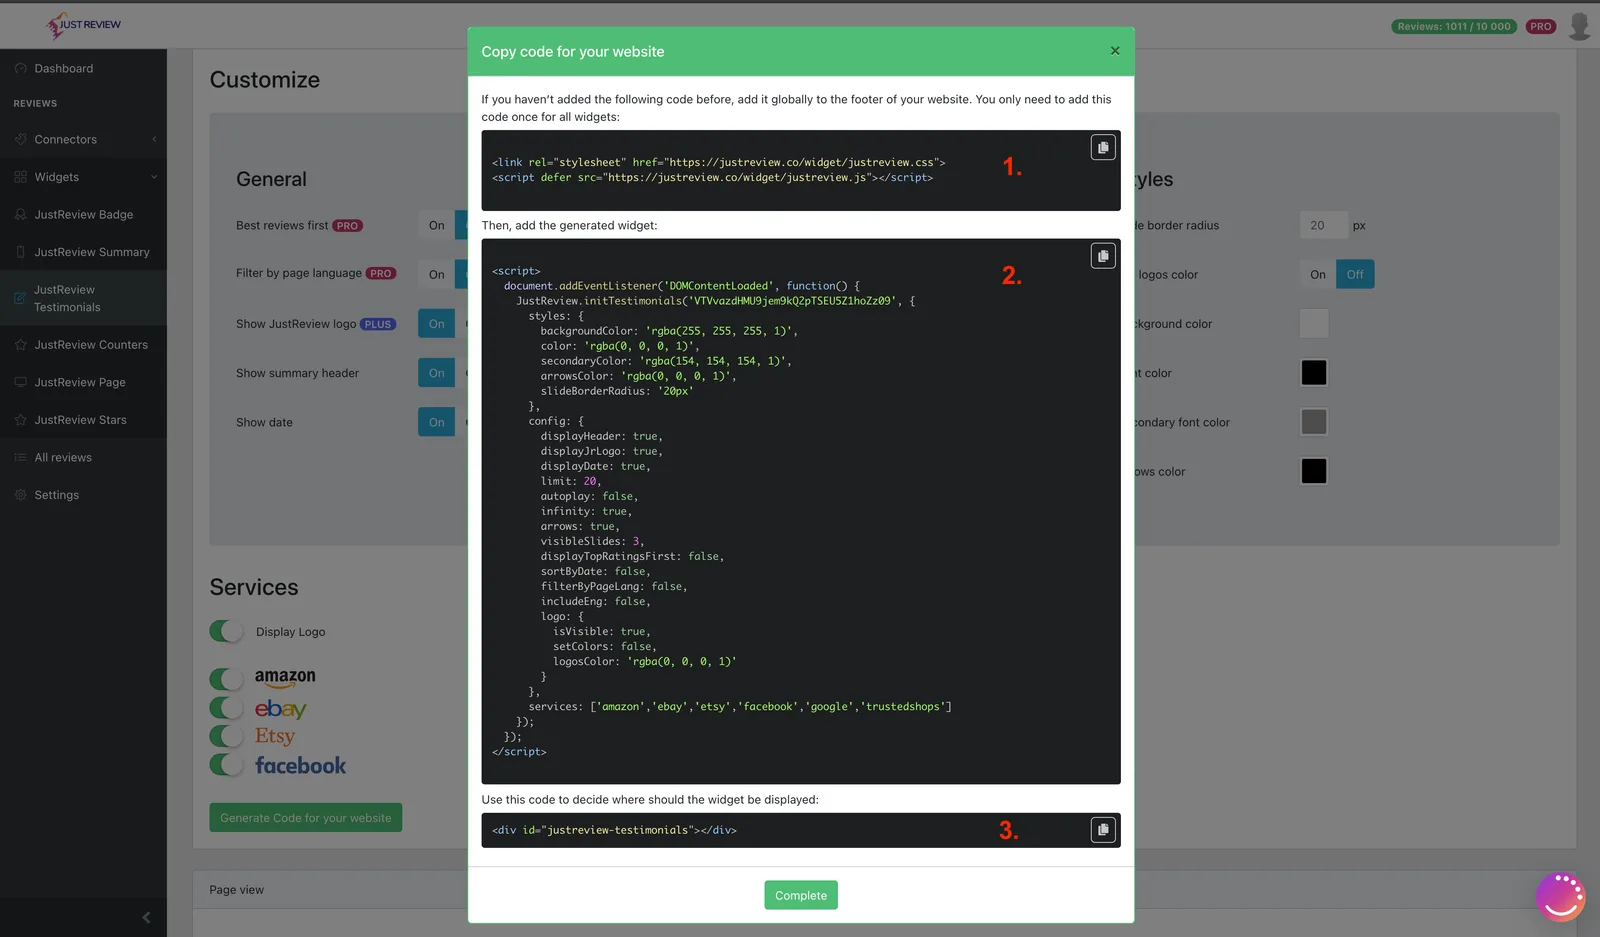
Build your widget and click “Generate Code for your website”.
-
Add the library to your theme templates.
Both files live in your theme:
httpdocs/themes/{your_theme}/templates/_partials/head.tplhttpdocs/themes/{your_theme}/templates/_partials/footer.tplPaste part 1 and part 2 at the end of these files. Part 1 loads the library and belongs there only once, even when you display several widgets. Part 2 is the configuration for one widget, so add one part 2 per widget.
footer.tpl: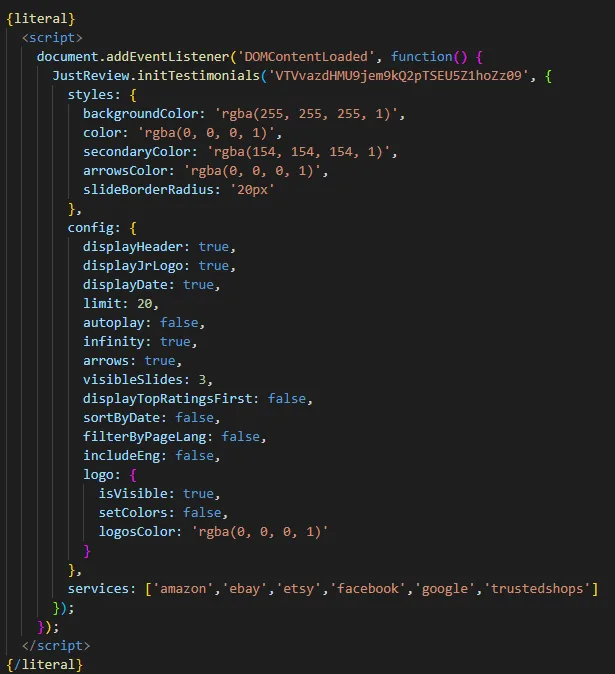
head.tpl:
-
Paste part 3 where the widget should appear.
Put the container
<div>into the template that renders that spot, for exampleindex.tplfor the home page orproduct.tplfor product pages.<div id="justreview-testimonials"></div> -
Clear the PrestaShop cache.
Go to Advanced Parameters → Performance and clear the cache, otherwise the shop keeps serving the old compiled template and your change appears to do nothing.
Widget still not visible?
- PrestaShop cache cleared after the edit (Advanced Parameters → Performance).
- Domain whitelist in Settings matches your shop address.
- Part 3 is present in the template that renders the page you are looking at.
- Smarty compilation set to recompile while you test, so template edits take effect.
- The Badge widget needs at least one review before it shows anything.