

Install the widget on any website
This is the universal method. Use it on any site where you can edit the HTML source, or as a reference when your platform is not listed in this help center.
If you use WordPress, Shopify, PrestaShop, Wix, Squarespace, GoDaddy or Shoper, follow the guide for your platform instead. The steps are the same, but you get the exact screens to click.
-
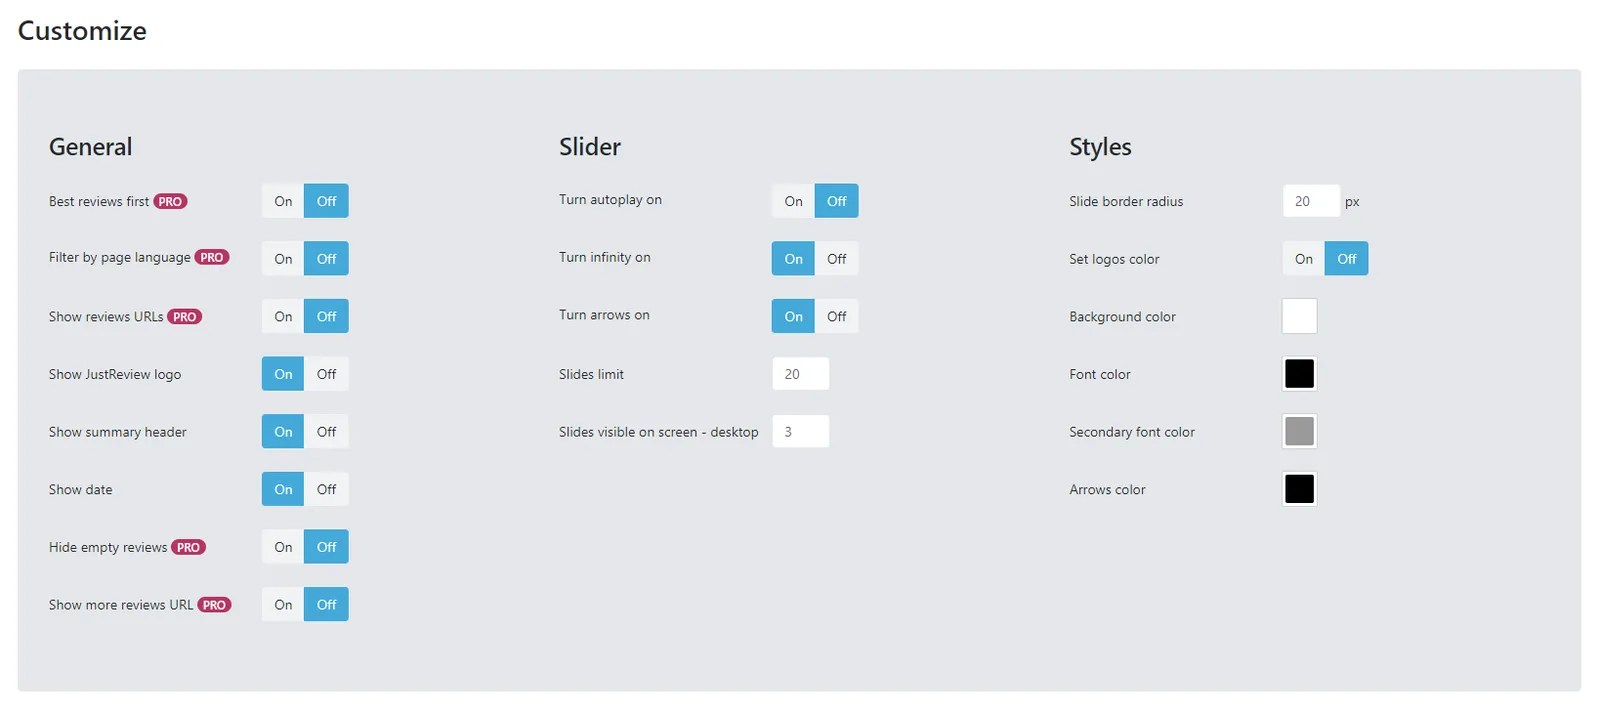
Build your widget in the dashboard.
Open app.justreview.co and pick the widget you want. Adjust the colours and layout in Customize, and choose which review sources to display in Services.
-
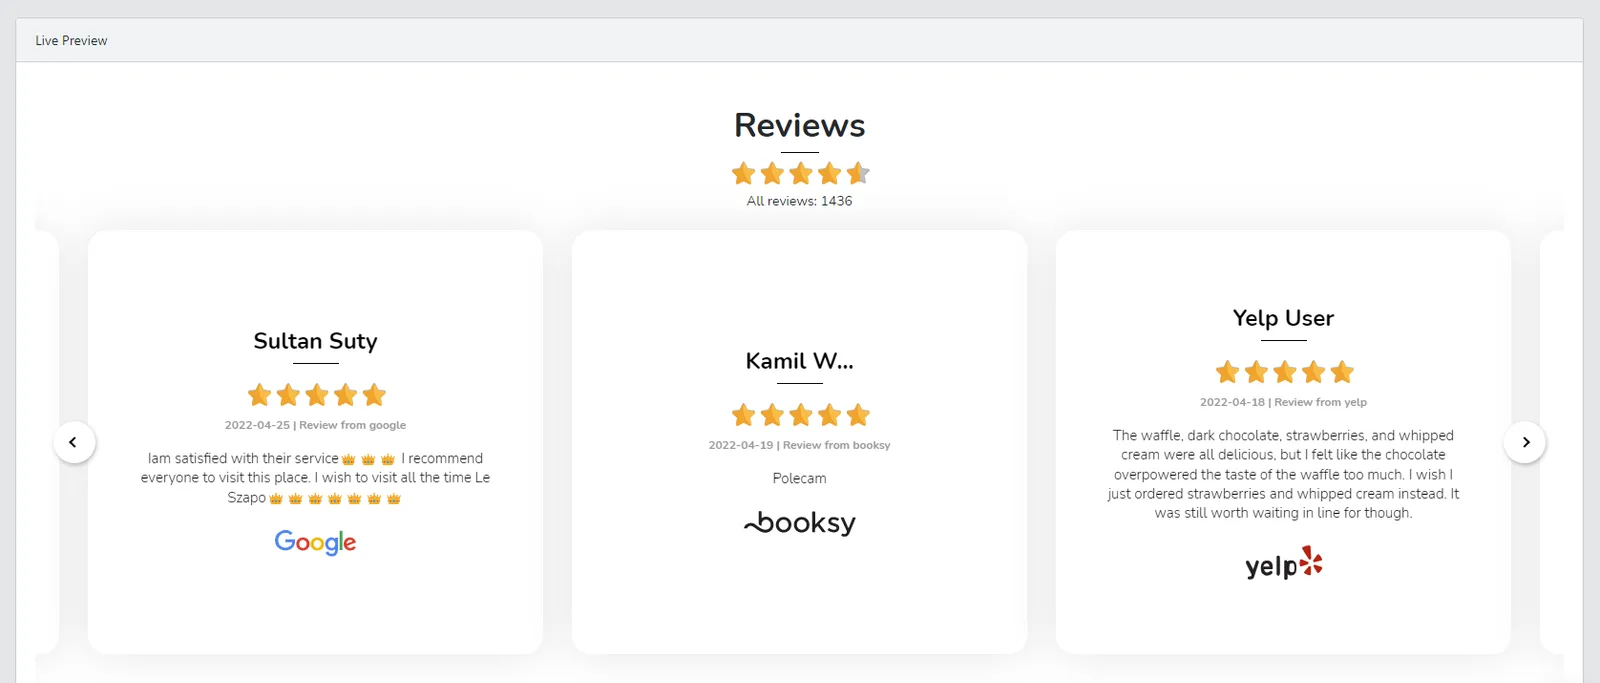
Check the live preview.
Below the Customize and Services sections there is a Live Preview window that reflects your changes in real time. Get it looking right here before you copy any code.
-
Pick the review sources to display.
In the Services section, select which connected sources should appear in this widget. A source has to be connected first, see Connectors.

-
Click “Generate Code for your website”.
-
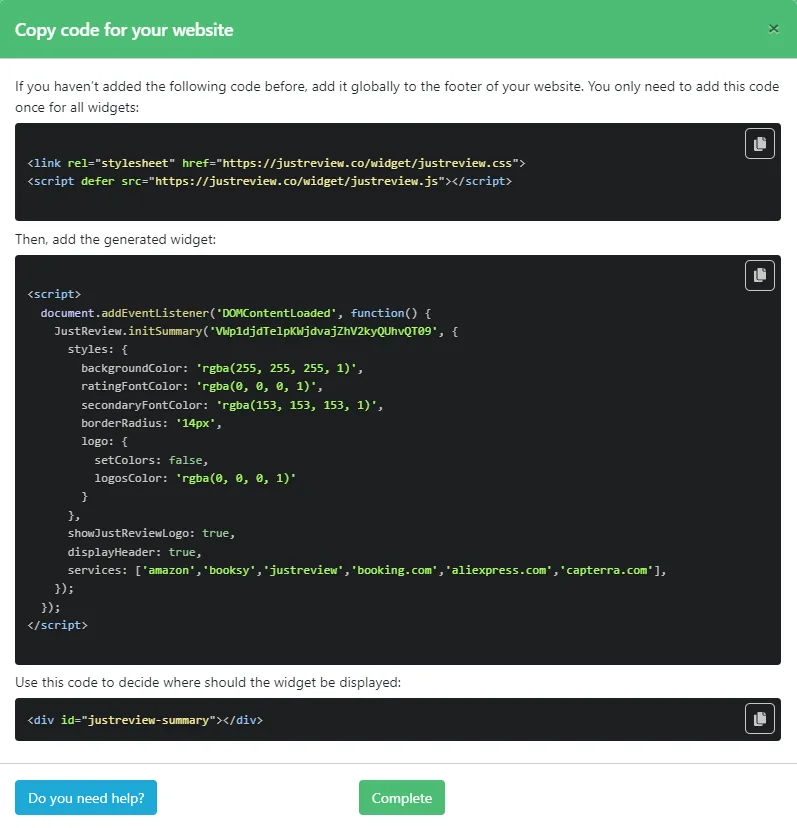
Copy the three parts of the snippet.
A dialog opens with up to three code blocks. Each has a copy icon in its top-right corner.
-
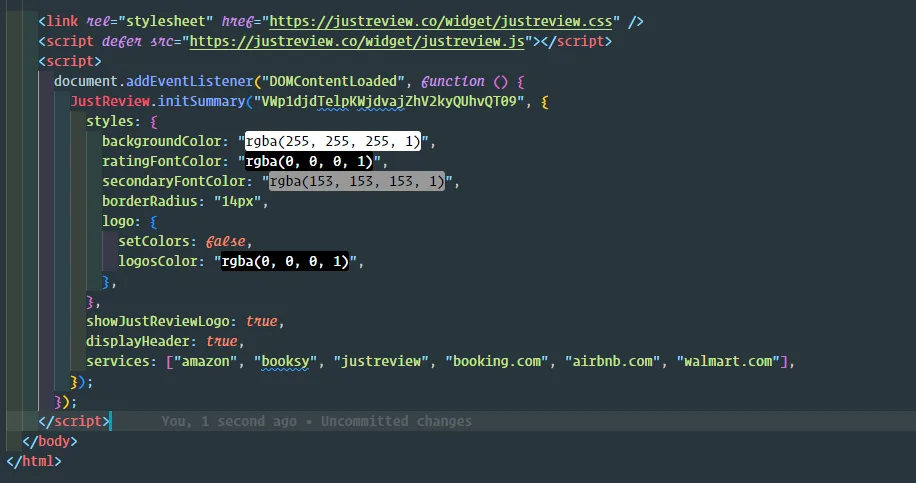
Paste part 1 and part 2 before the closing
</body>tag.Part 1 loads the JustReview library. Part 2 is the configuration object holding the settings you just chose. Part 2 must sit directly below part 1, otherwise the widget may not work.
<!-- part 1: the library. Paste this only ONCE per page, --><!-- even when the page shows several widgets. --><script src="https://justreview.co/widget/justreview.js"></script><link rel="stylesheet" href="https://justreview.co/widget/justreview.css"><!-- part 2: your settings. One block per widget, directly below part 1. --><script>initTestimonials("YOUR_USER_ID", { /* your settings */ });</script> -
Paste part 3 where the widget should appear.
Part 3 is the container element. Put it exactly where you want the widget rendered on the page. Some widgets, such as the Badge, attach themselves to the corner of the screen and have no part 3 at all.
<div id="justreview-testimonials"></div>